| User Roles | ✗Staff contributor | ✗External Contributor | ✗Pulse user |
This article provides a step-by-step guide on how to create a new client file in your firm’s environment and how to add consolidated files to your new created consolidation file. Follow these instructions to streamline the process and effectively manage your firm's data.
Table of contents
Step-by-step guide to adding a new client file
To add new file, navigate to your firm’s homepage and select 'Add new client'.
Step 1: File setup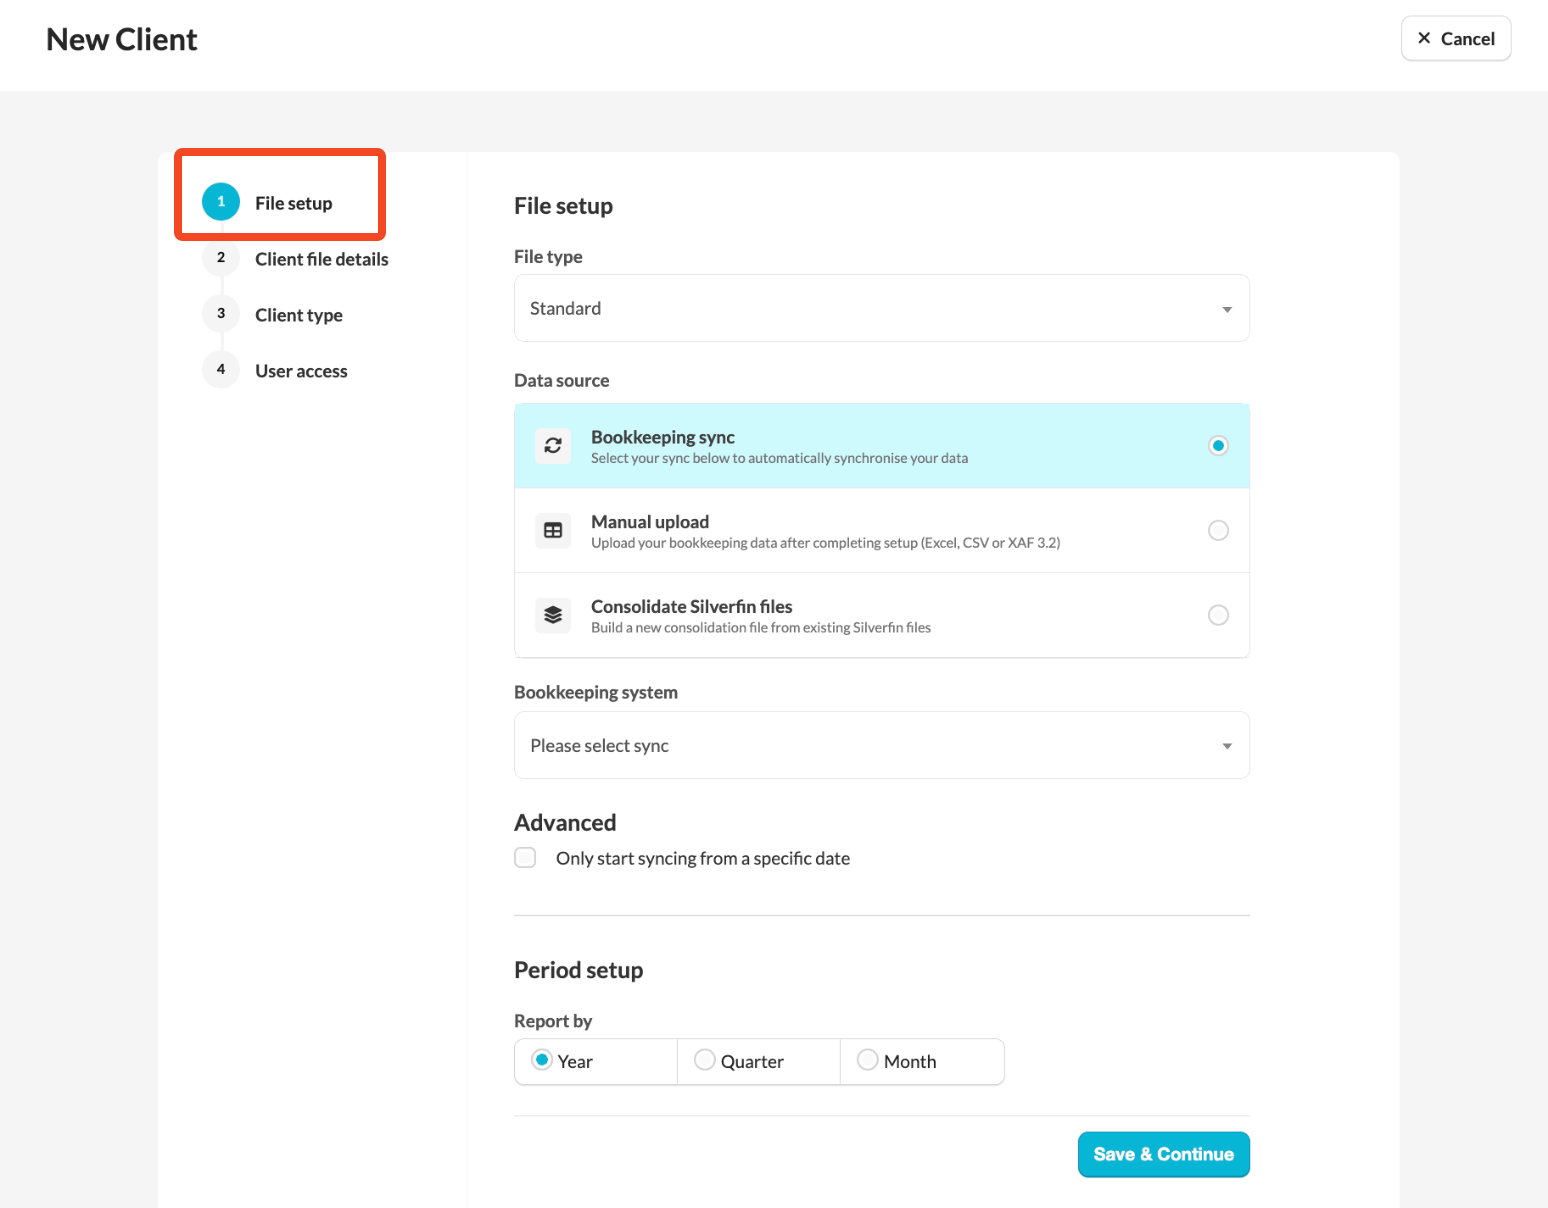
File type: Silverfin offers a variety of file types to choose from. Note that an analytical file comes at an additional cost. 
Data source: Select how you want to import data into your file.
- Automatic synchronisation: Select the sync entity to automatically synchronise data. You can also choose a specific start date for the sync.
- Manual upload: after set up of the file is completed, you will be able to upload your bookkeeping data. Select the client's end of first bookkeeping year.
- Consolidation file: build a new consolidation file from existing Silverfin files.
Reporting Frequency: Set the reporting frequency (e.g., monthly, quarterly). 
Step 2: Client file details

Administration sync: decide whether to fetch data from the administrative sync. This feature allows you to sync data such as:
- Company name
- Company address
- Legal form
- Directors' or secretaries' names, start dates, and resignation dates

Client file details: Provide basic details about your company, such as its name, address, company form, currency, logo of your firm. Only the company name is mandatory at this stage. You can add missing information later if needed.
- Silverfin does not do currency conversion
- company information are automatically populated if administration sync is active
Step 3: Client type
Select the client template for the file. This template, set at the office level, will automatically add a set of workflows and reports to the file, streamlining the setup process.
Step 4: User access
Decide who will have access to the file and to what extent. There are three access levels to choose from:
- internal staff users: Decide whether specific users or users with multi-file access should have access to the file. You can also add groups to the file.

- Pulse users: Select the Pulse template for the file. The Pulse template defines what external clients see upon logging in. The Pulse template is created by users with admin rights at the firm level. Add specific Pulse users to the file.

- external contributors: Add external contributors to the file. An additional charge applies for each additional external contributor. Contact your customer success manager for more information.

Once all these steps are completed, click the Create new client button to finalise the process.
Who can create client files?
Client files can be created by:
- users with admin rights
- Internal users who have been granted permission to create files in their user settings at the firm level

If you do not see the option “Can create a new file?”, please contact your Customer Success Manager.