
| User Roles |  Admin Admin | ✗Staff contributor | ✗External contributor | ✗Pulse user |
Groups are a way to organise and manage users with similar roles or permissions. In this short article, we'll explain how to create and manage groups in Silverfin.
Table of contents
- What is the purpose of creating a group in Silverfin?
- How do I create a group in Silverfin?
- How do I give a group access to a user or a file?
- How do I remove a group?
- Key information
What is the purpose of creating a group in Silverfin?
Groups in Silverfin make it easier to manage permissions, control access, and improve collaboration within your firm. They also let you quickly grant access to multiple users at once.
How do I create a group in Silverfin?
Groups are created at firm level by users with admin rights.
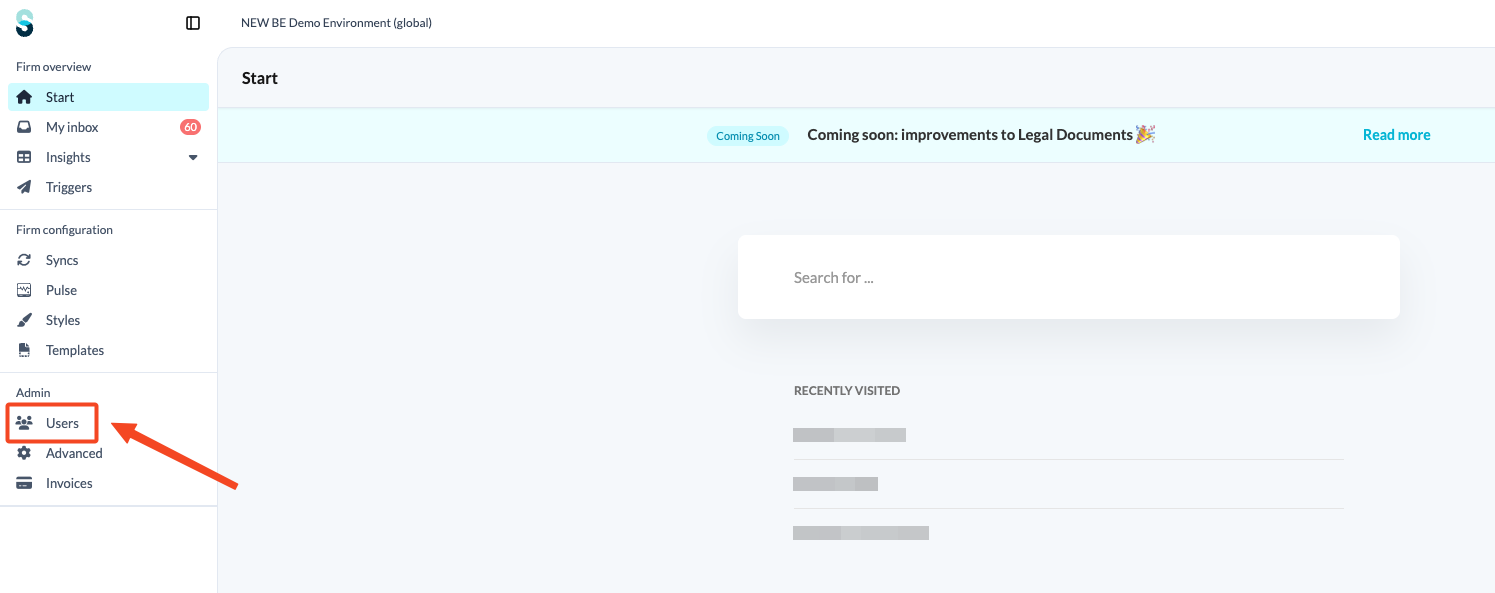
- Click on the 'Users' tab on the firm's landing page.
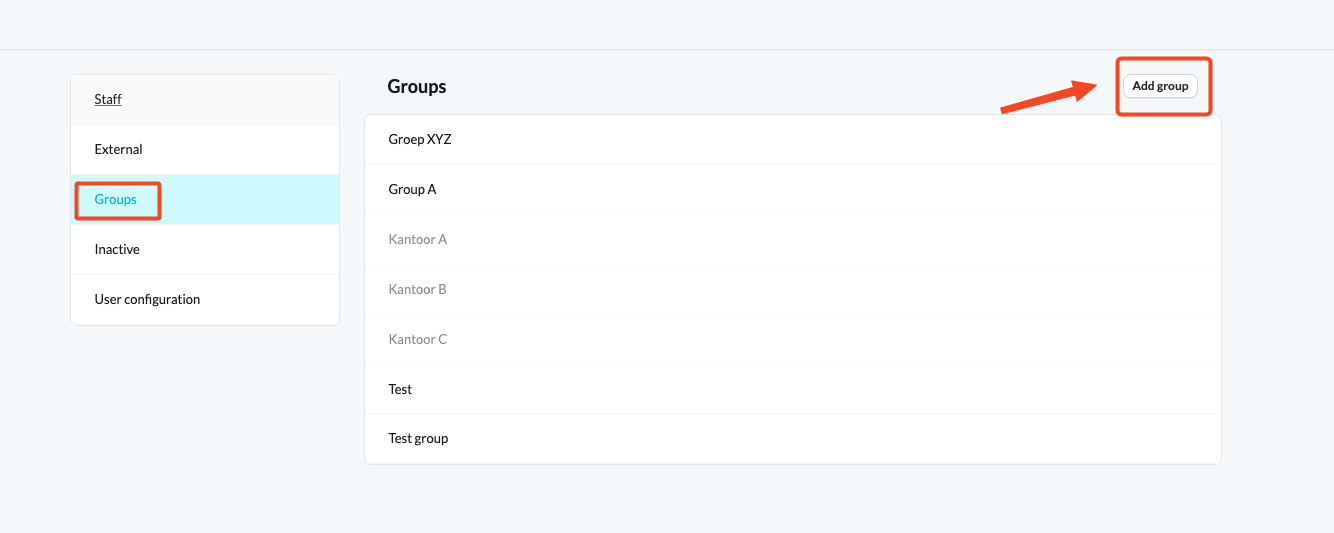
- Choose 'Groups' and click 'Add group'.
- Name the group, add users, and specify which files the group will have access to.

How do I give a group access to a user or a file?
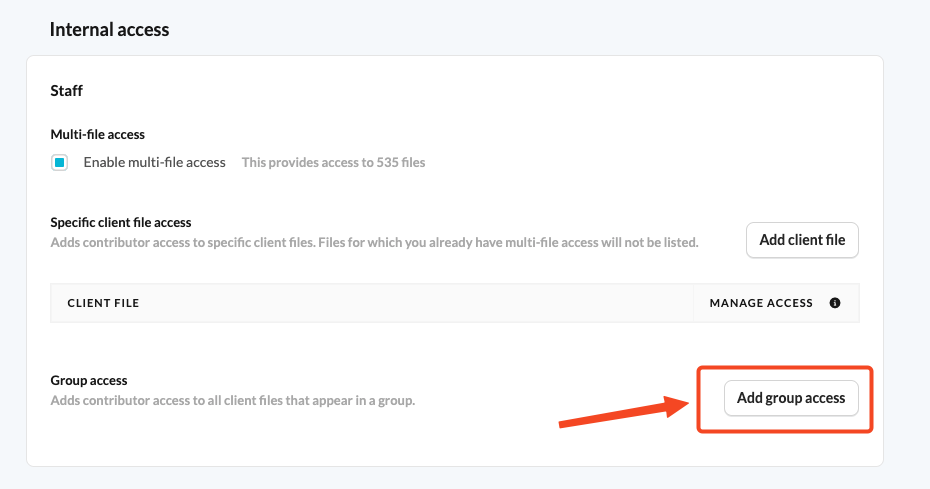
- Users with admin rights can add group access to an internal user at firm level.
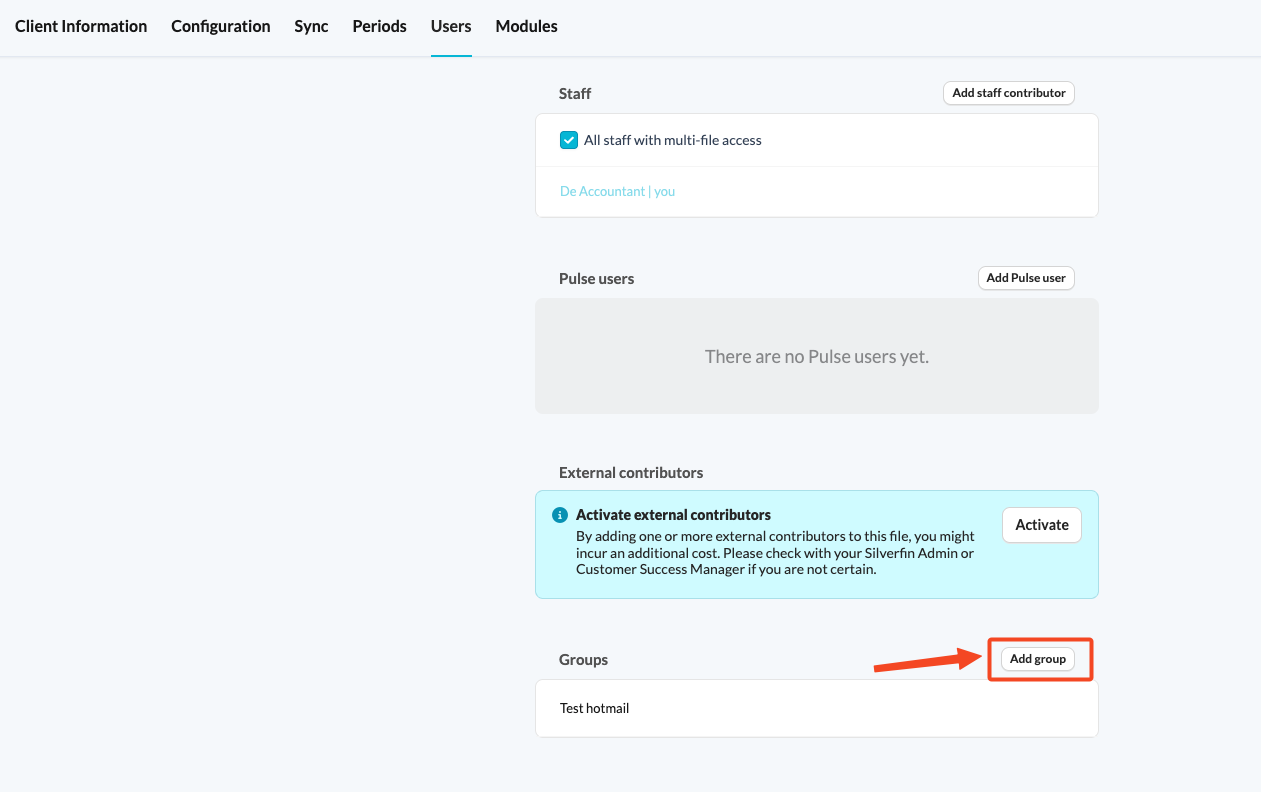
- Users with admin rights can add a group to a file. All users within a group will have access to that file.
How do I remove a group?
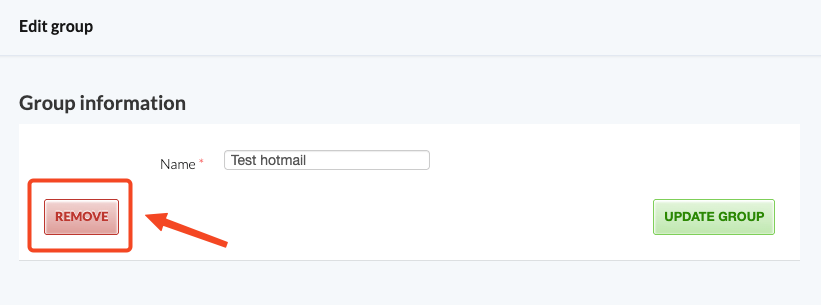
- Removing a group at firm level: users with admin rights can remove a group at firm level by opening the group and clicking 'Remove'.
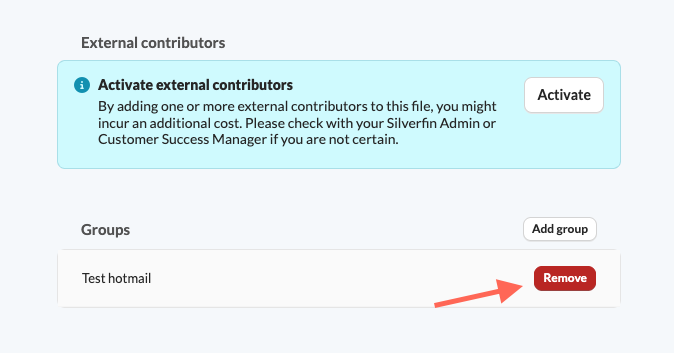
- Removing a group at file level: users with admin rights can hover over the name of the group and click the 'Remove' button.
Key information
- Only users with admin rights can create and manage groups.
- An admin user can only access and manage a group if they are included in it. If not, they cannot delete or modify the group at either firm or file level.
Adding a user to a group grants them access to every file linked to that group, so check the group's file list before you add someone.