| User Roles |  Admin Admin |  Staff contributor Staff contributor | ✗External contributor | ✗Pulse user |
This article explains how to connect cloud packages with Silverfin, both at firm level and at client file level. It covers packages such as Exact Online, Yuki, Sage Business Cloud Accounting, Xero, QuickBooks and Companies House. Follow the steps below to set up synchronisation and keep your data up to date.
Table of contents
- Which cloud packages can be connected with Silverfin?
- How can I set up synchronisation at the firm level?
- How can I link synchronisation at the client file level?
- How do I establish a connection with E-conomic, QuickBooks, Xero or XeroTB?
Which cloud packages can be connected with Silverfin?
Packages connected at firm level:
Bookkeeping syncs
- AFAS
- Business Central
- Cegid API
- Exact Online (BE)
- Exact Online (FR)
- Exact Online (NL)
- Horus
- Octopus
- Odoo
- Sage Business Cloud Accounting
- Twinfield
- Winbooks On Web
- WingsOnline
- Yuki
Administration syncs
- AdminPulse
- Companies House
- Corporify
- FID-Manager
- Virk
Packages connected at client file level:
There are no additional charges for synchronising with your cloud package.
If you are using another package, please verify if it is supported by Silverfin by referring to the following article.
How can I set up synchronisation at the firm level?
Only users with admin rights can enable synchronisation at firm level. To establish the connection, please follow these steps:
- On the firm overview screen, click the Syncs tab.
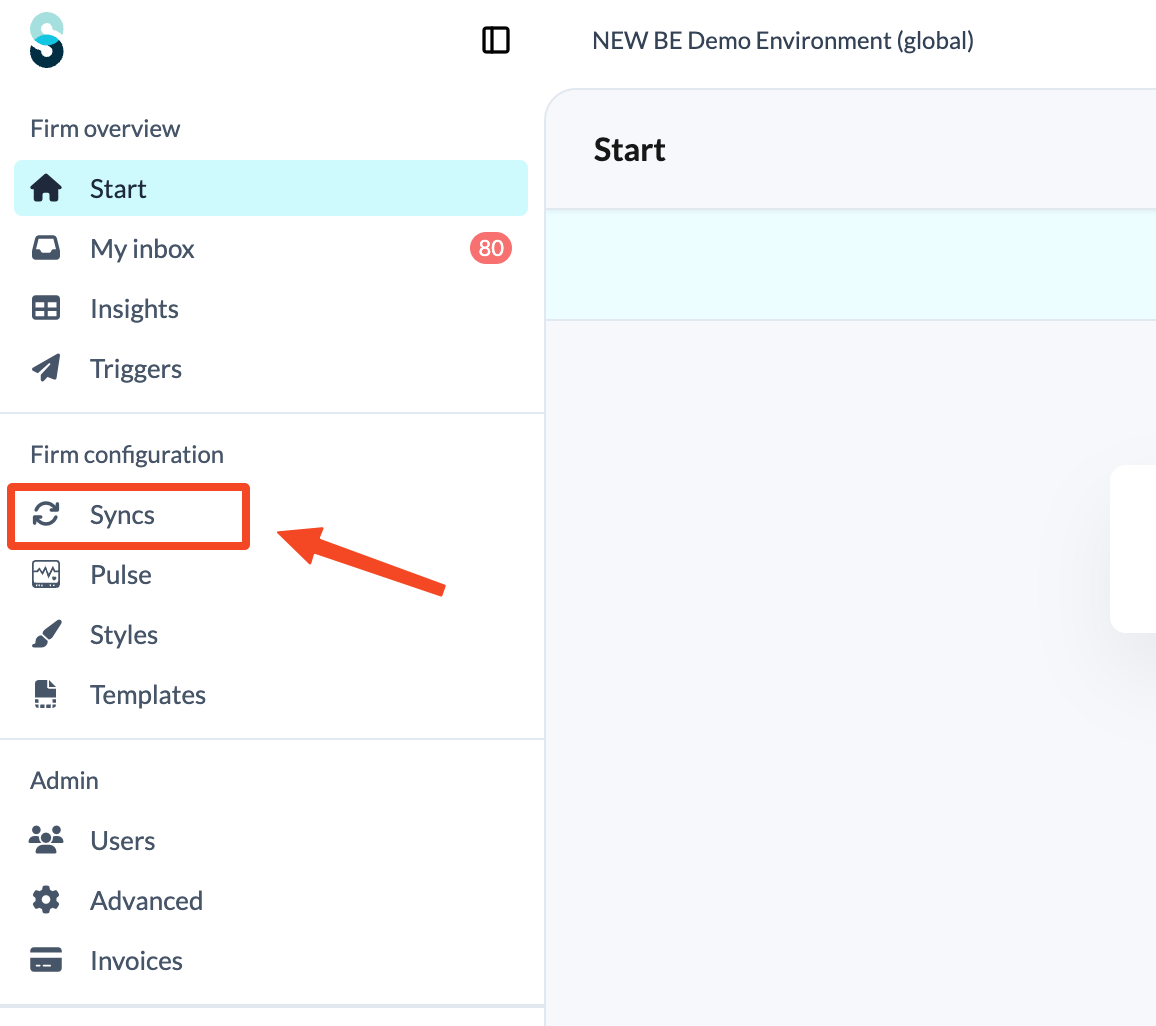
- Click the Add new sync button.
- Choose Bookkeeping sync or Administration sync.
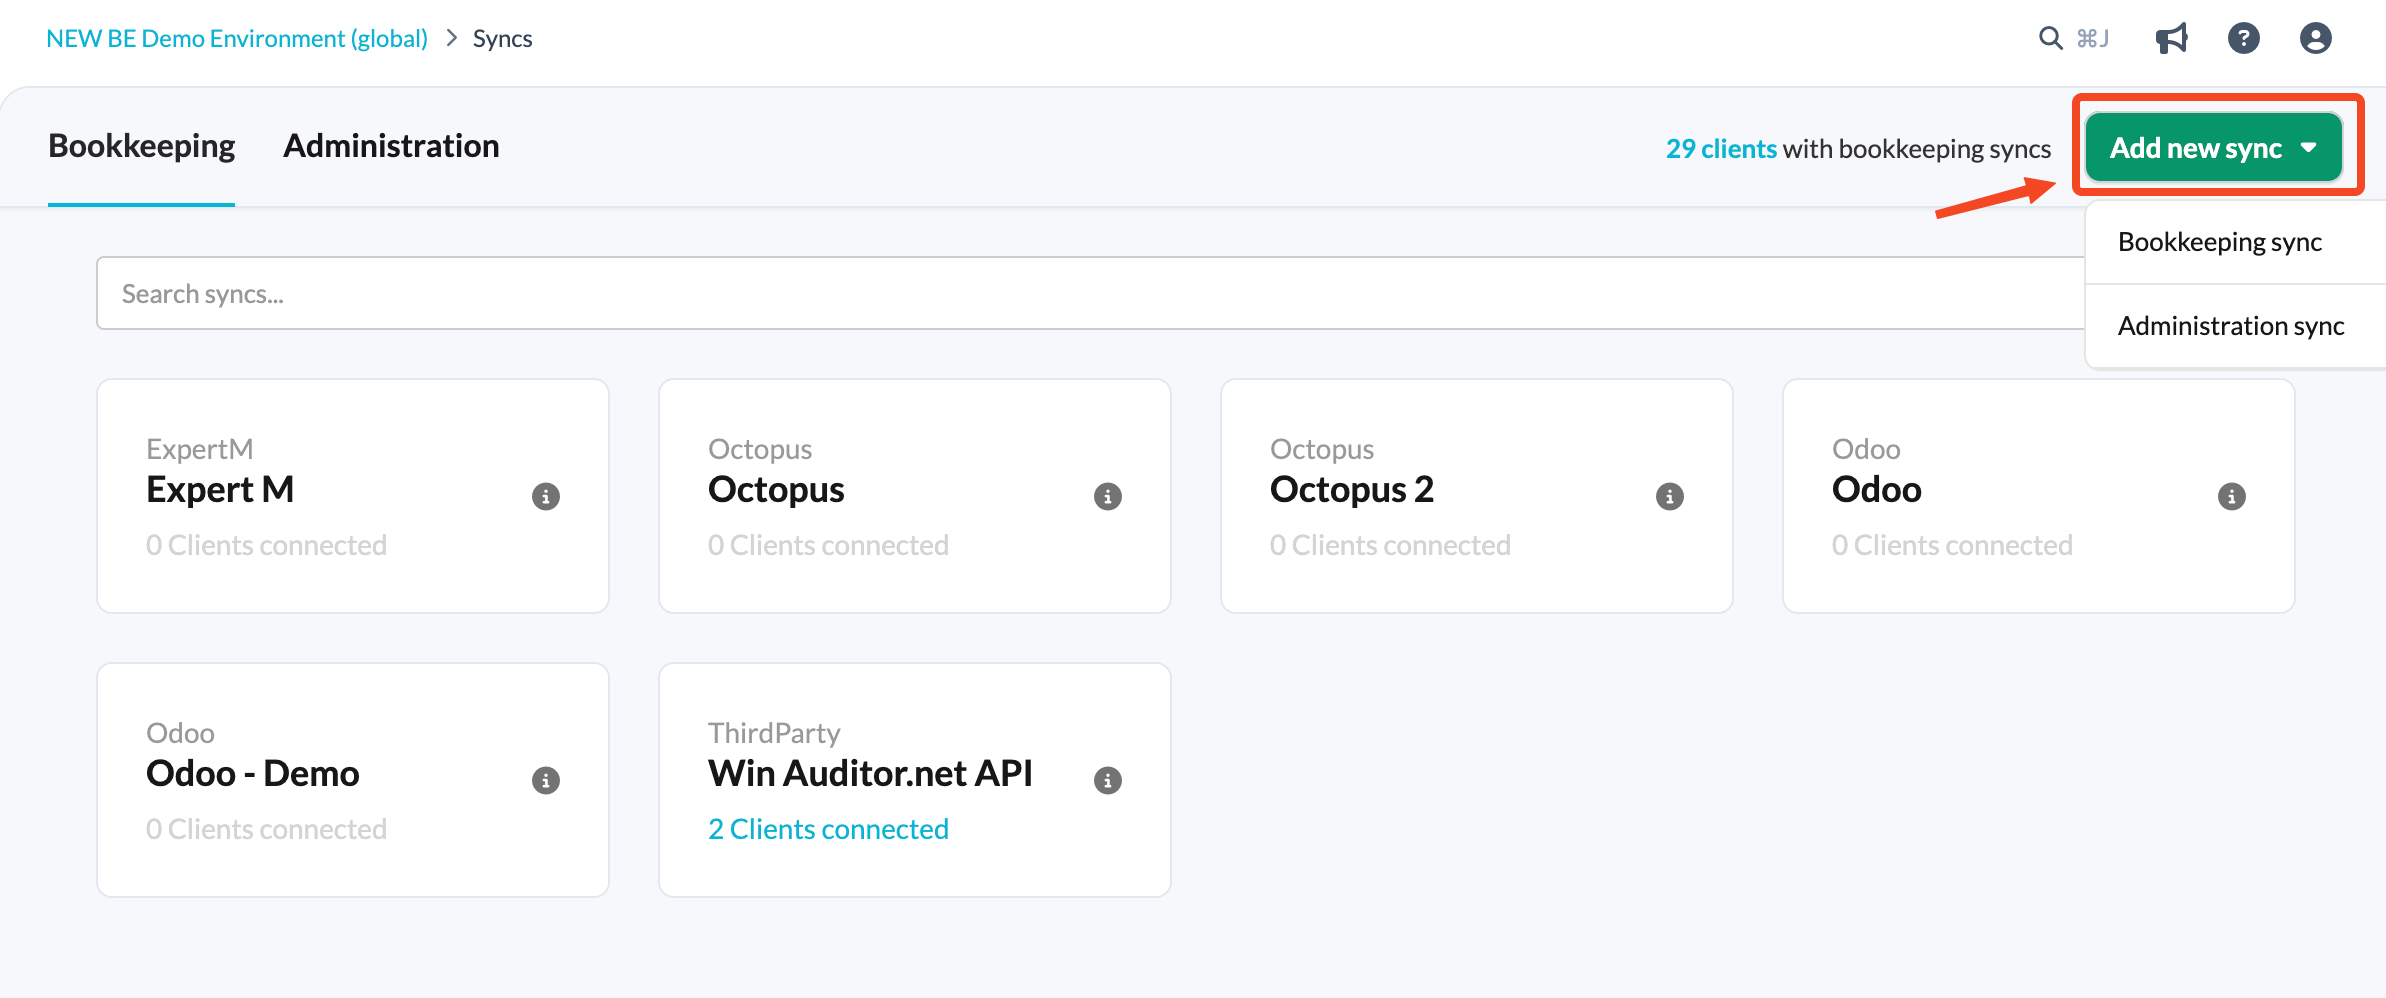
- Choose the package you want to connect to from the drop-down menu.
Once synchronisation is established, you can link it to your client file.
How can I link synchronisation at the client file level?
To link an existing synchronisation with the client file, please perform the following steps:
Bookkeeping syncs
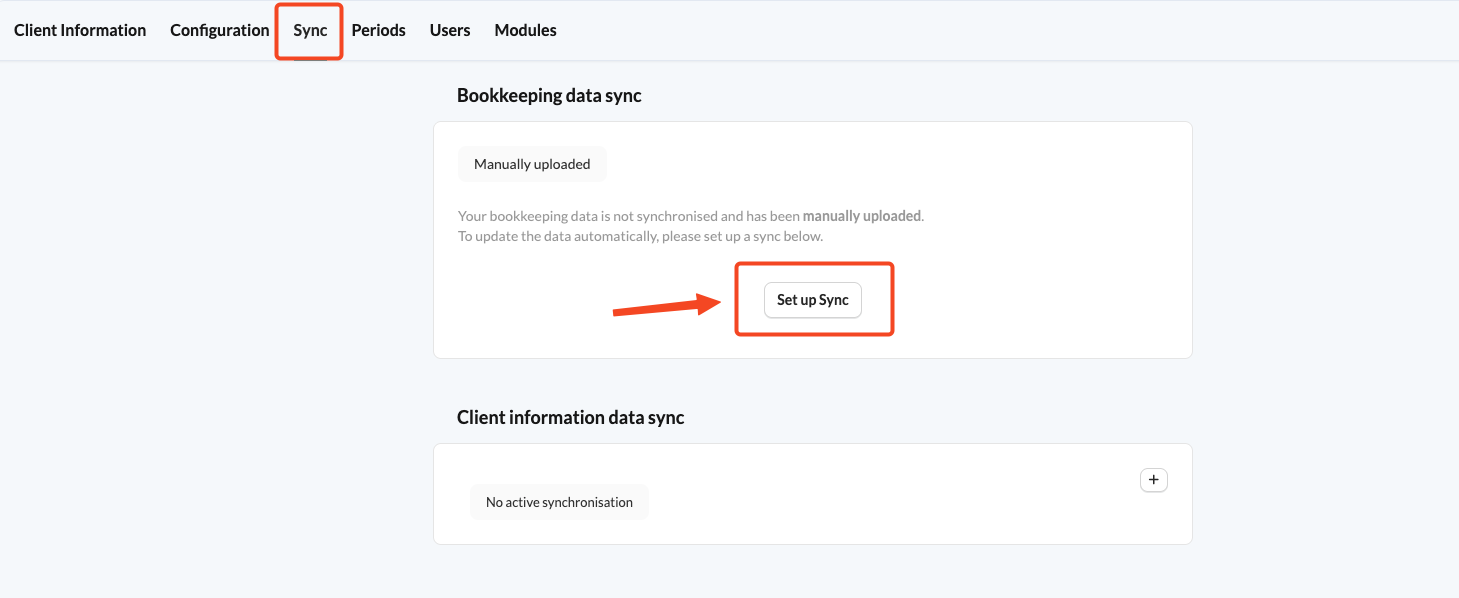
- On the client overview page, open the left-hand navigation panel and click Edit client.
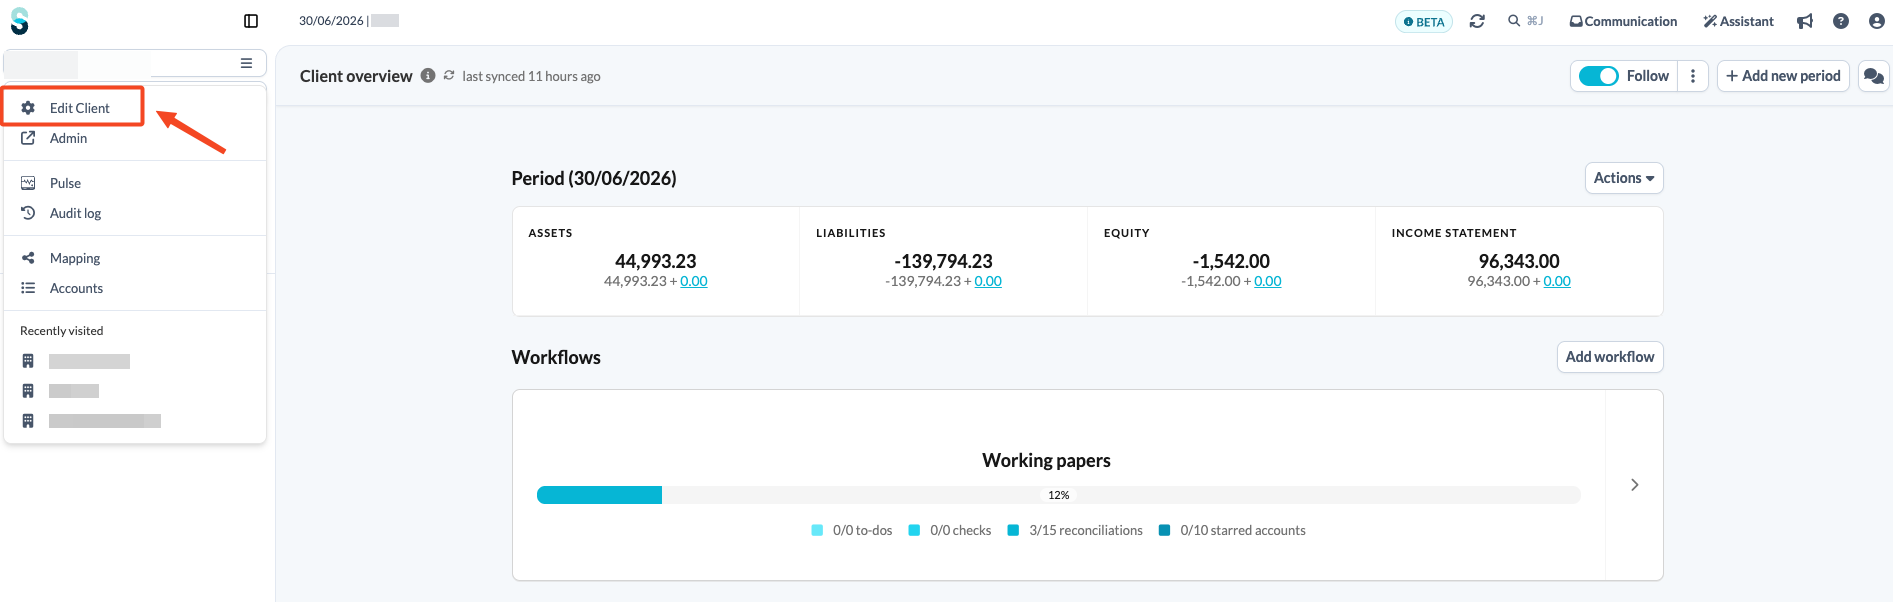
- Click the Sync tab.
- Click Set up Sync.
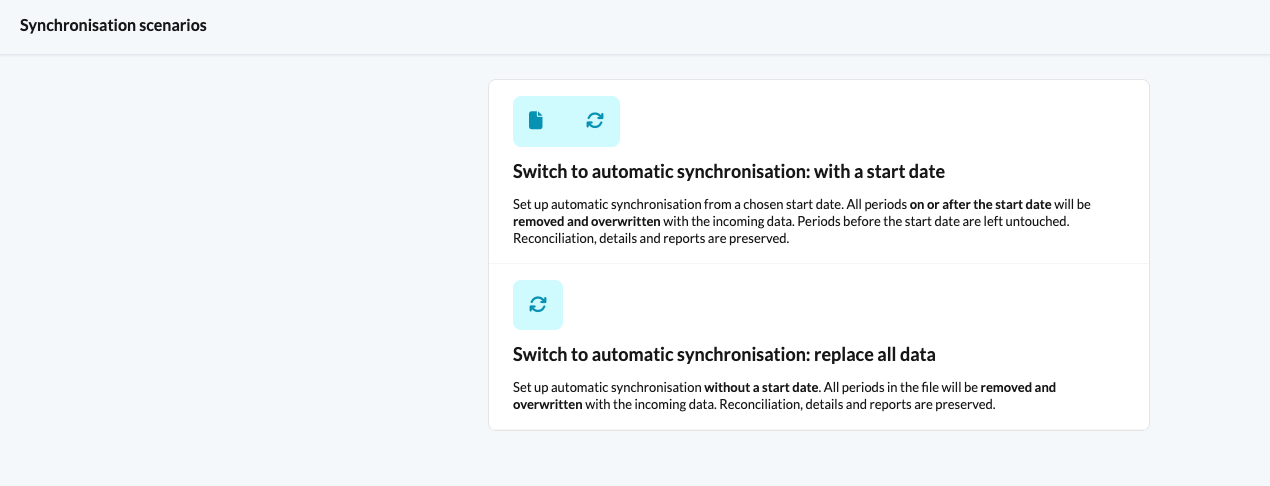
- Choose one of the provided synchronisation scenarios.
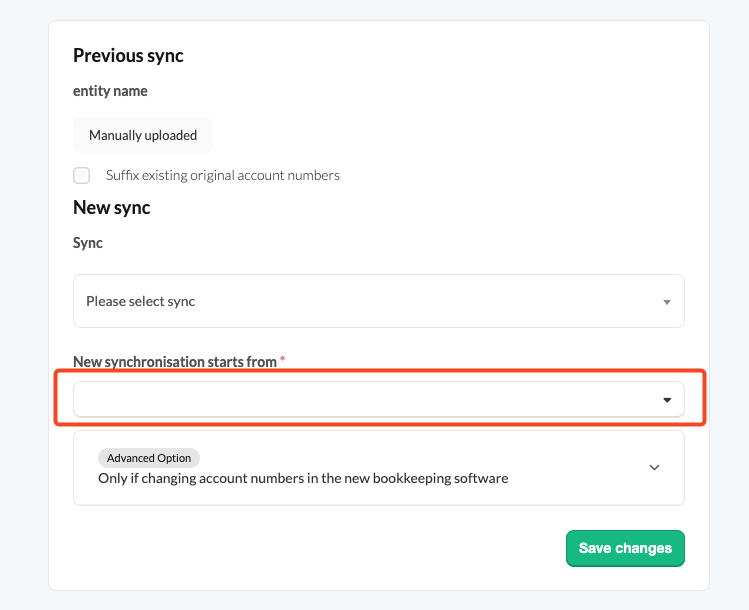
- If you have chosen the first scenario, you will be prompted to set the sync transfer date.
Figures are updated automatically every night with the latest data in Silverfin. To retrieve updated figures during the day, use the synchronisation arrows next to the client file name.
Administration syncs
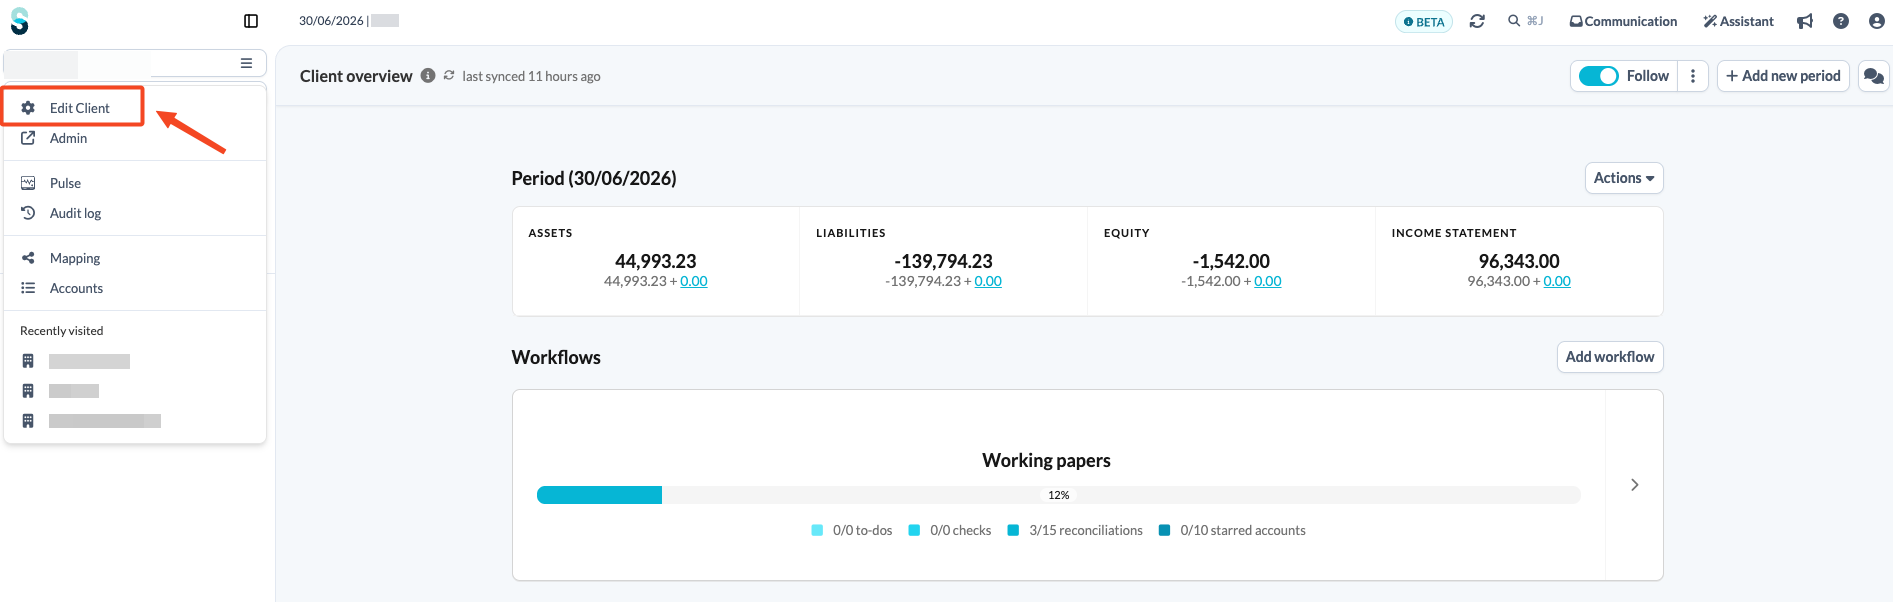
- On the client overview page, open the left-hand navigation panel and click Edit client.
- Click the Sync tab.
- Click the plus sign (+) next to Administration sync.
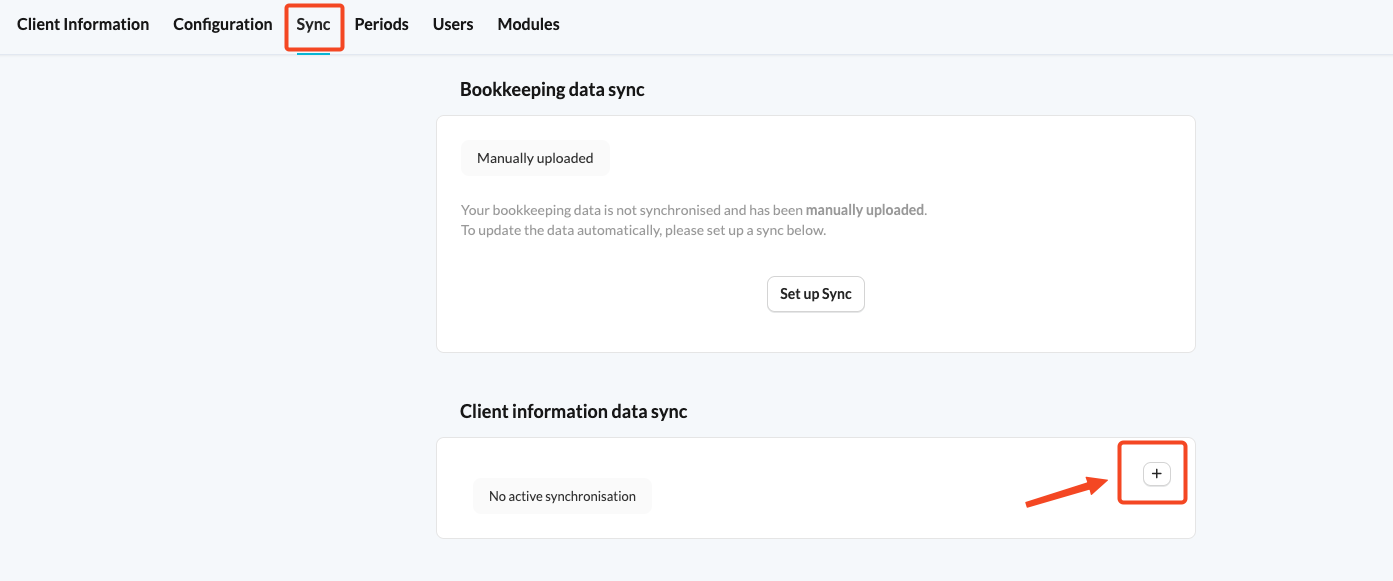
- Choose the sync from the list of available administration syncs.
- Assign the correct administration sync reference.
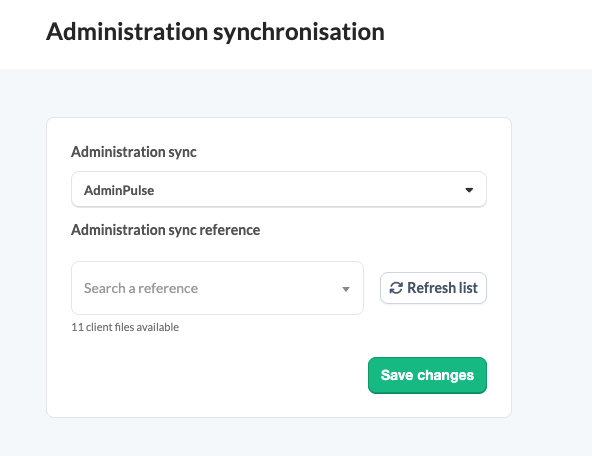
If the client file name doesn’t match the company name, it will automatically update to match the name from the administration synchronisation.
How do I establish a connection with E-conomic, QuickBooks, Xero or XeroTB?
If you want to use one of these syncs, you can do so while setting up the client file or when switching from an existing sync.
Method 1: Add a new client file
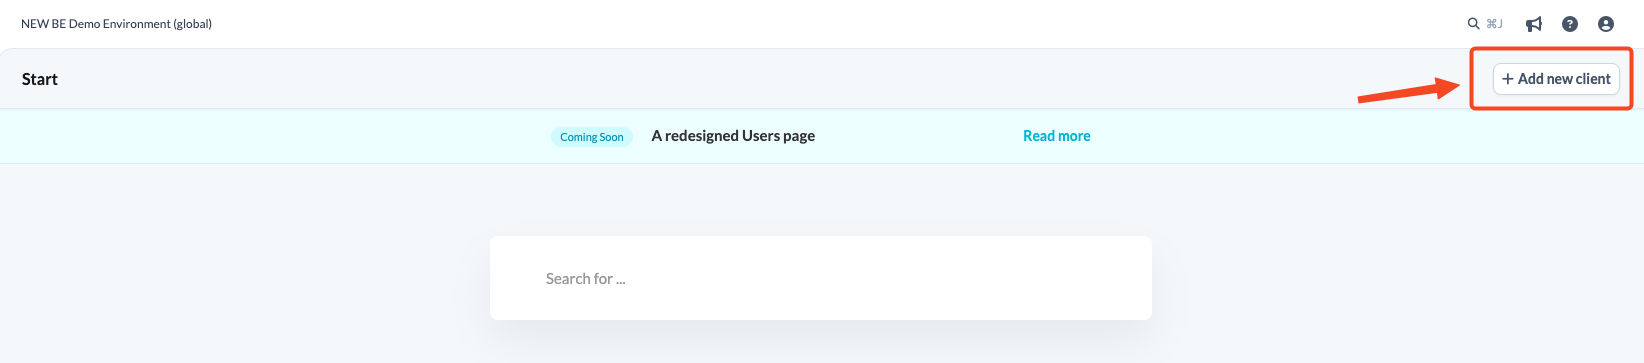
- Adding a new client file is done at firm level, where as an admin user you will find the Add new client button.
- When creating a new client file, choose Bookkeeping sync as data source.
- Select your sync from the drop-down menu.
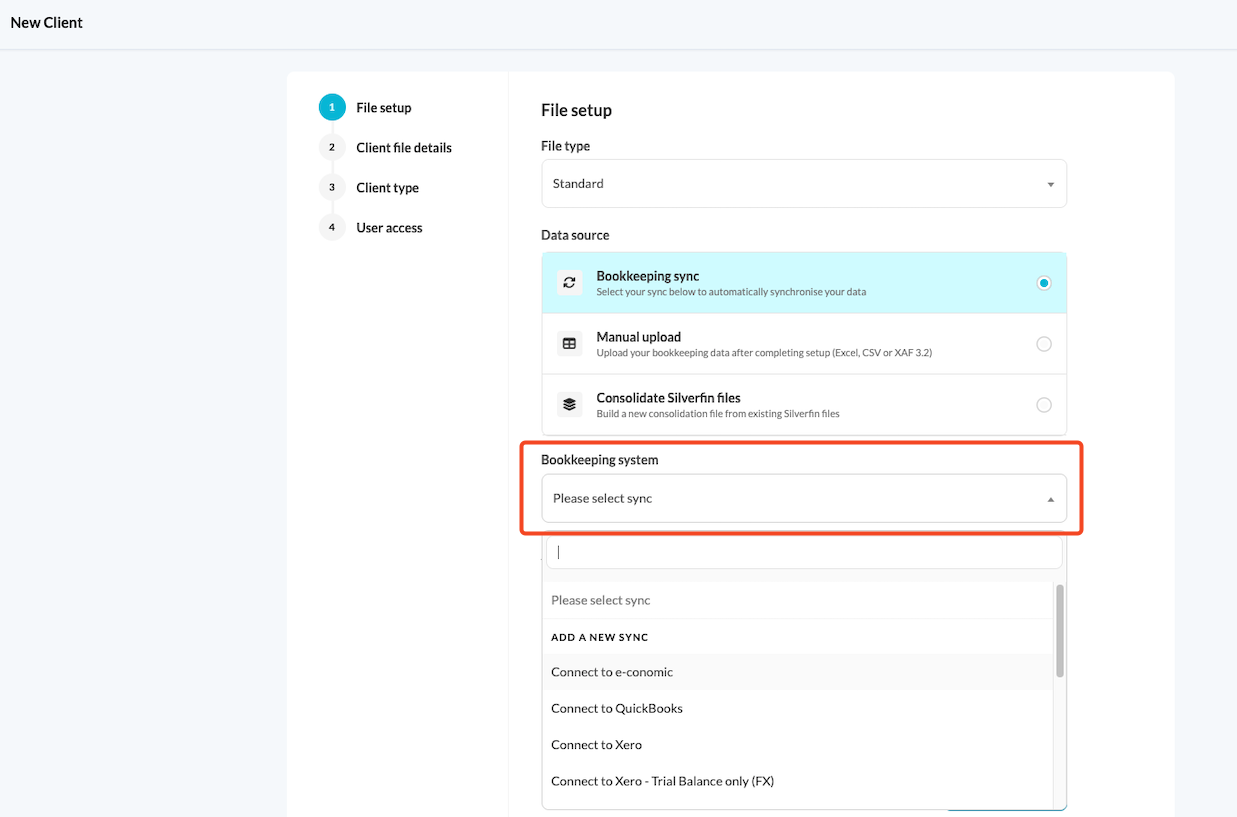
- When you save and continue, you will be redirected to the accounting software login page. Log in with the credentials of a user who has access to the client file you are creating and want to synchronise.
Method 2: Set up synchronisation in an existing client file
Once a client file exists, you can set up synchronisation at client file level.
- Upon entering the sync settings page, you will find available sync options in the drop-down menu.
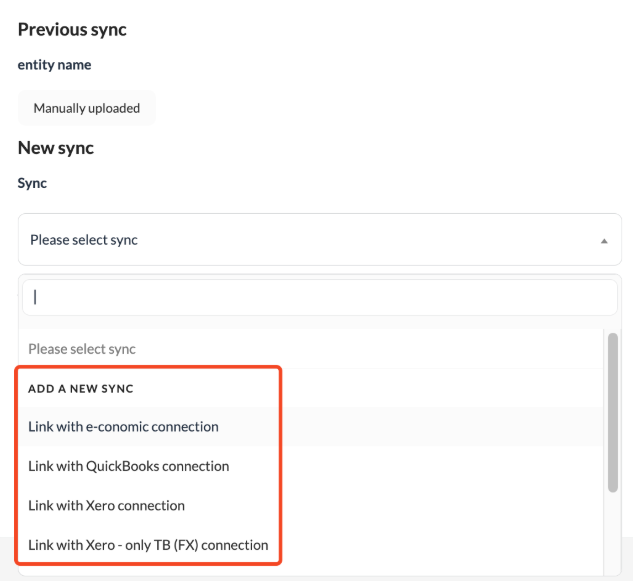
- When you save and continue, you will be redirected to the accounting software login page. Log in with the credentials of a user who has access to the client file you are trying to synchronise.